Installing a quality Moen Shower Trim Kit can be a daunting task, but it doesn’t have to be. With the right tools and instructions, you can easily upgrade your bathroom with a Shower Trim Kit.
In this article, we’ll provide a complete guide for installing the Shower Trim Kit along with tips and tricks for getting the job done quickly and effectively.
Introduction to Moen Shower Trim Kit
Installing a Moen shower trim kit is a great way to update the look of your shower. This complete guide will walk you through the process of installing a high-quality shower trim kit, step-by-step.
First, you’ll need to gather the necessary tools and supplies. You’ll need a Phillips head screwdriver, a utility knife, pliers, and a drill. Next, remove the old shower trim kit by unscrewing the screws that hold it in place. Be careful not to damage the wall or surrounding tiles.
Next, measure the space where the new trim kit will be installed. Cut the supplied plastic tubing to size with a utility knife and connect it to the water supply using pliers.
Now it’s time to install the new trim kit! Begin by attaching the escutcheon plate to the wall with screws. Then, attach the handle assembly to the escutcheon plate. Finally, install the showerhead and arm assembly according to the instructions included in your shower trim kit.
That’s it! Your new shower trim kit is now installed and ready for use!
What is included in the kit?
If you’re looking to upgrade your shower with a high-quality trim kit, the Moen Shower Trim Kit is a great option. This complete guide will walk you through everything you need to know about installing a Shower Trim Kit, including what’s included in the kit.
The Shower Trim Kit includes everything you need to install a new shower trim. The kit includes a shower valve, handle, escutcheon plate, and temperature control knob. All of the necessary mounting hardware is also included in the kit.
How to install a Moen Shower Trim Kit
Installing a Moen shower trim kit is a great way to improve the look and function of your shower. This comprehensive guide will walk you through the entire process, from start to finish.
To begin, gather all of the necessary tools and materials. You will need a drill, screwdriver, level, tape measure, and shower trim kit. Once you have everything you need, it’s time to get started.
- Start by removing the old shower valve trim. Use a screwdriver to remove the screws that hold it in place. Carefully pull the trim away from the wall, being careful not to damage the surrounding area.
- Next, use your drill to create pilot holes for the new trim screws. Be sure to use a level to ensure that the holes are even and straight.
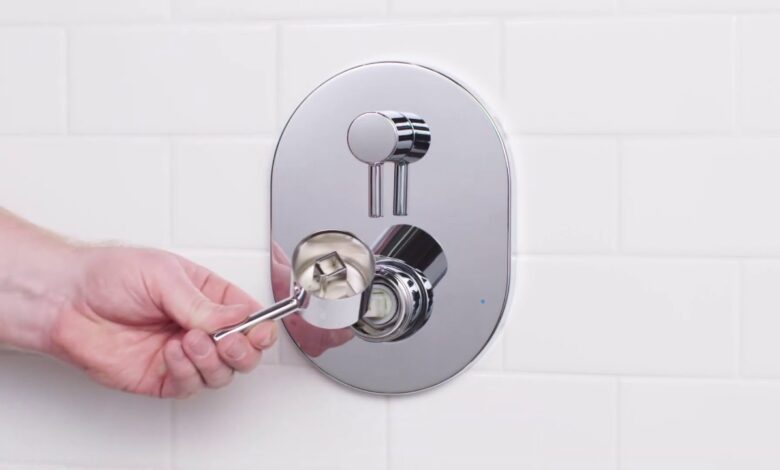
- Now it’s time to install the new Moen shower trim kit. Begin by attaching the escutcheon plate to the wall with screws. Then, attach the handle and lever arm using the provided set screws. Finally, snap on the decorative cover plate.
- Test your new trim kit by turning on the water and checking for leaks. If everything looks good, you’re finished!
Pros and Cons of Using a Moen Shower Trim Kit
There are many factors to consider when choosing a shower trim kit. One important factor is the brand. Moen is a well-known and trusted brand, so you can be sure that its products are high quality. Another important factor is the price. Moen shower trim kits are very affordable, making them a great option for budget-minded consumers.
When it comes to the actual installation process, Moen shower trim kits are very easy to install. The instructions are clear and concise, and the entire process can be completed in just a few minutes. This is a big advantage over other brands, which can often take hours or even days to install.
One potential downside of using a Moen shower trim kit is that they can be difficult to find in stores. They are not carried by all retailers, so you may need to order one online or through a specialty retailer. However, this should not deter you from using a Moen shower trim kit, as they are definitely worth the effort!
Tips for Installing a Moen Shower Trim Kit
If you’re looking to add a touch of luxury to your shower, then installing a Moen shower trim kit is a great way to do it. But before you start your installation, there are a few things you need to keep in mind to ensure that everything goes smoothly. Here are some tips for installing a Moen shower trim kit:
- Make sure that the trim kit you purchase is compatible with your shower valve. There are many different types and models of Moen shower valves, so it’s important to make sure that the trim kit you buy is designed for the specific model that you have.
- Once you’ve determined which trim kit is right for your valve, the next step is to install the escutcheon plate. This part of the trim kit covers the hole in your shower wall where the valve is located. Be sure to follow the instructions that come with your particular trim kit on how to properly install the escutcheon plate.
- The next thing you’ll need to do is install the handle adapter onto the valve stem. Again, be sure to consult your trim kit’s instructions on how to properly do this step.
- Finally, it’s time to install the actual handles onto the adapter. Once again, make sure you follow any specific instructions included with your particular trim kit regarding this step.
- Once all of these steps are complete, turn on your water supply and test out your new Moen shower
Troubleshooting Common Issues with Installation
If you’re having trouble installing your Moen shower trim kit, don’t worry – you’re not alone. Many people have issues with installation, but there are some common solutions that can help.
The first thing to check is the size of your trim kit. Make sure it’s the correct size for your shower space. If it’s too big or small, it can cause problems with installation.
Another common issue is making sure the trim kit is level. Use a level when installing the trim kit to make sure it’s even on all sides. This will help ensure a professional-looking finish.
If you’re still having trouble, contact a professional plumber or contractor who can help you install your Moen shower trim kit correctly.
Alternatives to the Moen Shower Trim Kit
If you’re looking for an alternative to the shower trim kit, there are a few other options out there that you can consider. One option is the Delta shower trim kit, which is designed to provide a similar level of quality and performance as the Moen kit.
Another option is the American Standard shower trim kit, which is also designed to provide a high-quality showering experience. Finally, if you want to save some money, you can always opt for a generic shower trim kit from your local home improvement store.
Conclusion
Installing a shower trim kit is an excellent way to upgrade your bathroom and create a more modern, inviting space. By following our simple guide, you can have this high-quality trim kit installed in no time at all.
It’s important to remember that with any plumbing project, it’s always best to hire a professional if you aren’t confident in your own abilities as even small leaks can cause big problems down the line. With the right tools and instructions, however, installing a Moen shower trim is easy enough for anyone who takes their time and pays attention to detail.

