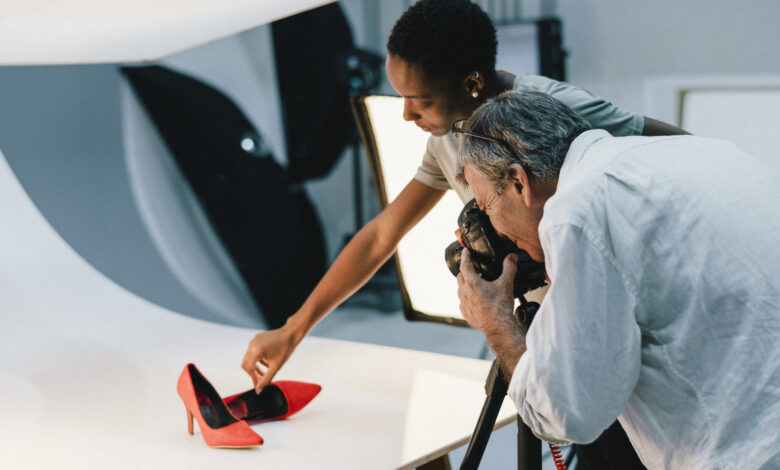
6 Best Product Photo Tips (2023)

Businesses launch over 30,000 new consumer products each year. About 95% of them fail. Only 40% of developed products make it to market.
Of that 40%, only 60% will generate any revenue. Without an eye-catching product photo and marketing strategy, you could struggle, too.
Not sure how to take the perfect photo of your new product? Read on for the product photo tips you need today!
1. Look for Good Lighting
First, look for a room that’s already well-lit. Try to find a large window. A larger window provides more natural life, which can bring your product to life.
To take product photos with softer light and darker shadows, take the photo closer to the window. For lighter shadows, move away from the light source.
Adjusting your lighting can alter the appearance of your product. Without natural lighting, you could spend hours trying to retouch your photos. No amount of editing tips can produce the same outcome natural lighting can provide.
Try to choose natural light through a window instead of artificial light when you can. Natural light comes from a single direction, which will add texture to your products.
Before taking your product photos, consider the weather outside. You might prefer to take photos when it’s a little overcast, instead of when it’s a blaring, sunny day.
Once you decide where you want to take your photos, adjust your set up. Position your product and set up about 90 degrees to the right or left of the window. Try to take your photos at the brightest time of the day.
If the sun is too bright, consider using a diffuser sheet. A diffuser sheet will allow you to soften the light.
When taking your photos, try to avoid the hard light. Hard light can make your product colors look saturated. Consumers will have an easier time seeing tiny flaws, too.
You can control natural light using reflectors and foam boards, namely when the sun disappears behind clouds mid-shot. Foam boards intensify the light to fill shadows. Reflectors allow you to manipulate light onto your product.
Take a few test photos to determine what angles work best.
2. Get a Tripod
Avoid holding your phone or camera when taking photos. Instead, invest in a mini tripod. They range from inexpensive to pricey, allowing you to choose an option that fits your budget.
Using a tripod when taking photos will reduce camera shaking and human error. It also helps standardize your photo style and angles as you take photos of multiple products.
If you’re taking product photos using your phone, choose an option with a gripping clamp that suits your phone model.
3. Set Up the Backdrop
To give your photos a consistent, clean look, choose a backdrop. Consider starting with a white backdrop to minimize distractions. You can use poster board or white paper (depending on the size of your products).
Grab a table to plan your backdrop on, then use tape to hold it down. You can stick the product to your backdrop if needed, too.
Make sure your backdrop remains white. A white backdrop will reflect natural light onto your product. If it doesn’t stay white, you’ll end up with an unevenly lit photo.
Using a backdrop can make the editing process easier, especially if you plan to remove the background later. Otherwise, consider photo background removal services. Removing the background will ensure consumers focus on the product.
When placing your backdrop, make sure it’s underneath and behind your product. This will make lighting and editing easier in the long run.
4. Use a Diffuser Sheet
Control your lighting using white bounce boards. A bounce board can help minimize strong shadows.
It could also create a more balanced lighting environment as you take your product photos. Consider buying a bounce board made of foam from Amazon. Make sure it’s white.
Set up a diffuser sheet when the sun is shining a little too bright. Otherwise, the lighting could appear too hard. You can use printer paper, parchment paper, or a shower curtain if necessary.
5. Consider the Angle
When taking your photos, try to take as many shots from as many angles as possible. Your customers will have an easier time examining the product. This will also give you more photos to choose from when you’re ready to select finalists for editing.
Some angles work better than others for product photography. Use different viewpoints to highlight different features.
Giving consumers an all-around view of the product will keep them engaged. It can also help them envision themselves using or wearing the product. Making this process easier for customers can help you boost sales.
You can take your photos from eye level, high angles, low angles, bird’s eye, or slanted angles.
When taking photos, keep your tripod in the same spot. Then, rotate the product to change the angle.
6. Make Edits
The photo editing process can help your photos look clean, crisp, and eye-catching.
First, choose a product photography app. There are free options available online.
Choose the image you want to edit. Start with:
- Brightness
- White balance
- Highlights
- Shadows
- Contrast
- Sharpness
Make adjustments as needed to ensure your product looks its best. Avoid tints, filters, or oversaturation. Instead, try to make sure the product looks the way it does in real life.
During your product photo editing process, consider saving presets for later. Using presents can save you time.
Take the Perfect Product Photo Today
Want to maximize sales for your new product? Make sure to take the perfect product photo first. An eye-catching photo can help you attract new buyers!
Use these product photo editing tips today to capture the perfect shot.
Searching for more tips? You’re on the right blog.
Check out our latest articles today.


